Illustrator to Raphaël JS: A Guide
Over the summer, I came across an absolutely wonderful JavaScript library called Raphaël that blew me away. Using some maths and some patience, Raphaël allows you to to draw Scalable Vector Graphics (SVGs) through code in any browser, from Internet Explorer 6 all the way up to Mobile Safari. So when I sat down to create my website previous website design, I decided that I wanted to use Raphaël to build out the UI elements in my site that would otherwise be done using normal images. While that sounded great as a goal, it turned out to be harder than I had imagined it would be, in part due to information about getting graphics from Adobe Illustrator (my vector drawing program of choice) into Raphael code is sparse, at best. Here is the process I used, hopefully it can be useful to others.
Before going any further, it is worth noting some of the shortcomings of the Raphaël library and SVGs in general in their current incarnation and implementation in web design. First and foremost is that SVGs, while widely supported, aren’t universally supported. While Raphaël does a great job of supporting Internet Explorer 6 through Mobile Safari, older mobile browsers and any stock BlackBerry browser below OS6 or stock Android browser below Honeycomb mostly don’t support SVGs, so the end user sees nothing. Another issue is that the SVGs that are created cannot be inserted into a page’s CSS and cannot be tiled like normal images can, which may (and has) presented a problem doing a full migration from images to SVGs. The final consideration to take into account when using Raphaël is that each item you draw must be associated with a unique CSS ID. While that doesn’t sound like a big limitation, especially for one off graphics like a logo or, in my case, Snugug, it does present a problem if you want to do repeating UI elements in SVG, like the tips of the flags on my main scroll. That being said, I’ve devised a way to to draw Raphaël elements based on a an item’s class which doesn’t require a fork of the library, which will be presented below.
We are going to need four tools open and running before we start. First, we’re going to need our Illustrator file open, second, we are going to need the Raphael SVG Import tool from GitHub, third, our source code opened in an editor, and fourth, a good web browser to view our work in. While Firefox with Firebug is a tried and true method for many, I personally prefer Google Chrome, so I will be using that for this guide.
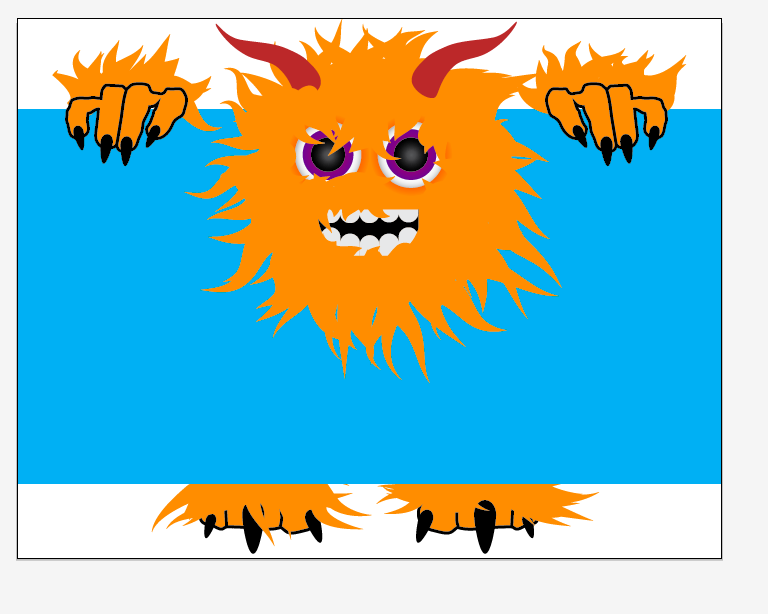
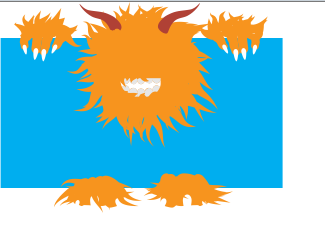
The first thing that we need to do is prepare our Illustrator image for import into Raphaël. There really isn’t a science to this part, it’s more of an art. Because the process we’re going to be using will make us copy each object that forms our drawing individually, the fewer the number of objects the better. In the case of Snugug (pictured below), I broke him down into pieces, each hand was one piece, each fingernail another, the base fur for each hand another, etc… My personal suggestion is to merge as many small like items together as you can. For instance, the base fur for the head is made up of a solid shape and hand drawn lines that come out; I merged these together to create one solid object. The following are important item to bare in mind when preparing your file:
- Raphaël handles gradients differently than we would hope, and the importer doesn’t handle them at all, so replace gradients, at least for the export, with solid colours.
- Raphaël doesn’t support any of the stylize effects (with the possible exception of rounded corners) so do not use any of them in your export
- Raphaël doesn’t support 3D transformations of any sort
- Raphaël doesn’t support textures
- If your drawing doesn’t follow the KISS Principle, it probably won’t work in Raphaël.
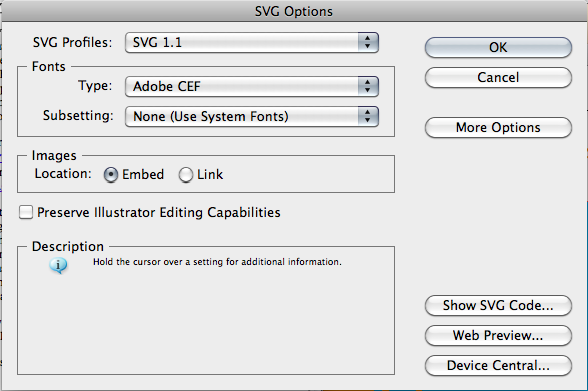
Now that we have a file that we’re ready to export into Raphaël, we simply need to go to the Import Tool and open demo.html in our browser (again, I choose Google Chrome). In Illustrator, go to File->Save As. Choose SVG (sag) as your Format and press Save. You will get a dialogue box with SVG options. Keep them all as is, what we’re interested in is the Show SVG Code… and Web Preview… buttons.
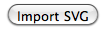
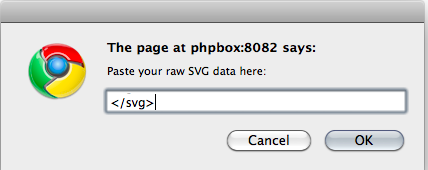
First, press Web Preview… to make sure what you’re going to wind up with is actually what you want. If it is, press Show SVG Code… This is where the magic happens. A .txt file will open up with your SVG Code! What you need to do is copy the SVG code, so from <svg> down. From there, go to demo.html and press the Import SVG button. A prompt will come up to enter your SVG code. Paste your SVG code in and press enter.
Congratulations! You have your SVG into Raphaël code, but chances are it doesn’t look quite right, just look at poor Snugug!
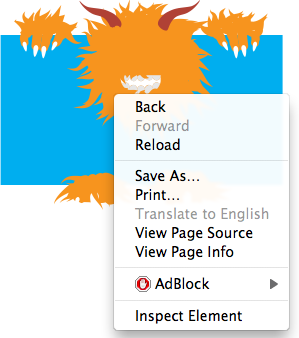
Now it’s okay that it’s messed up a little bit, what’s wrong is actually just fills and lines, which we are going to fix when we put this into code with attributes. What’s most important, and what this step ultimately is all about, is getting the paths out of the Illustrator SVG file in a Raphaël friendly manner. What we’re going to do is CRTL+Click (Windows, right click) on an element and press Inspect Element of one of our items
When you do that, Chrome will pop up it’s Element Inspector. The Element Inspector is a great tool, as it gives you all of the styles of the item you’ve selected, nests nested items, and highlights what you’re looking at in place. I’ve inspected the element of the main fur, so that’s highlighted as well as what I’m looking at
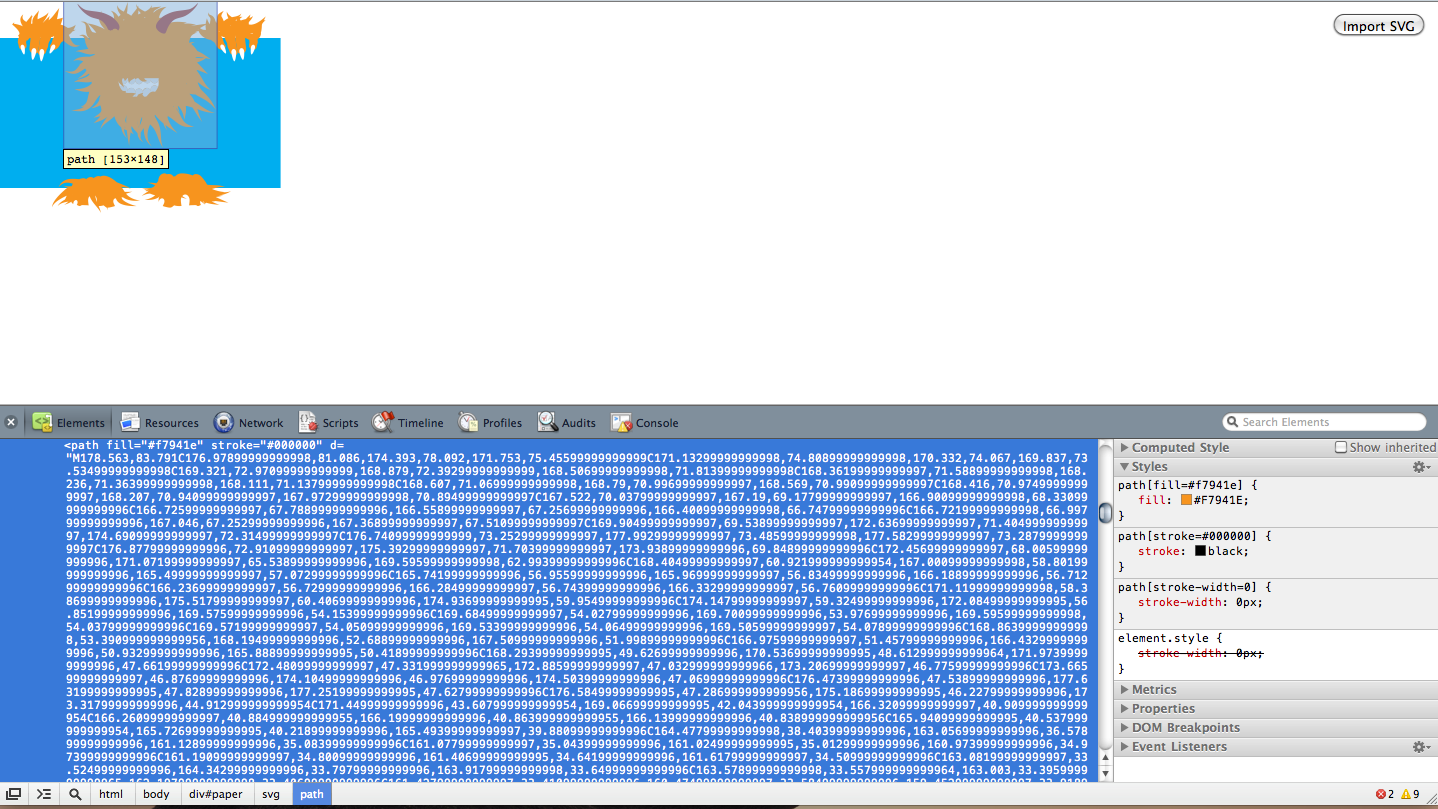
Now, Chrome makes this even better! That element that’s selected, we can copy that out of the Element Inspector! Do just that by pressing CMD+C (CTRL+C on Windows) and paste that text into your favorite text editor. What you’re going to get is a big ol’ mess of junk, but really all we need to do to get this into a format that we can use with Raphaël is to remove the tags surrounding the path. The tags for Snugug’s head look like this (yours will be similar, and please bear with me while my syntax highlighting is broken):
<path fill="#f7941e" stroke="#000000" d= style="stroke-width: 0px; " stroke-width="0"></path>Those two things will surround quotes with the path inside. The path will start with M and end with Z. After you’ve deleted those two things, you’ve got yourself a path you can use with Raphaël!
Open up your source HTML code, link Raphaël and jQuery to it, and create a div tag with an ID that you want to import your Raphael code into! I’m going to call mine snugug-head.
<html>
  <head>
    <title>Illustrator to Raphaël Import</title>
    <script type="text/javascript" src="raphael-min.js"></script>
    <script
      type="text/javascript"
      src="https://ajax.googleapis.com/ajax/libs/jquery/1.5.1/jquery.min.js"
    ></script>
  </head>
  <body>
    <div id="snugug-head"></div>
  </body>
</html>
Next, we want to set up a script to draw our path when the DOM is ready. In normal JavaScript, kinda hard to do, that’s why we’re using jQuery. There are three ways to do this in jQuery, but the one I like the best is:
$(function () {});Remember, this needs to go inside <script> tags or attached as a separate JavaScript file. Inside the DOM Ready function, we are going to create three variables, one for our canvas that we’re going to be drawing one, one for our attributes so we can use the same attributes in multiple places, and one for our actual path. First, let’s set up the canvas.
var snugug_paper = Raphael("snugug-head", 235, 145);So what we’ve done here is create a variable called snugug-paper, calling the Raphael function with parameters snugug-head, 235, and 145. Snugug-head is the name of the ID we’re going to be drawing on, 235 is the width of the canvas we’re going to be using (should be the same as the width of our artboard in Illustrator), and 145 is the heigh of the canvas we’re going to be using (again, should be the same as the height of our artboard in Illustrator). Next, we’re going to create a variable for the attributes for our path. We do this instead of hardcoding the attributes after the path for reusability.
var snugug_fur = {
  fill: '#f7941e',
  stroke: 'none',
};
Here, I want to have a single fill colour and no stroke. For full documentation as to what attributes you can assign, please read the Raphaël Documentation (link to docs). Now we only have one more thing to do before we’ve got this path in! Let’s create a variable for our head!
var snugug_head = snugug_paper
  .path(
    'M178.563,83.791C176.97899999999998,81.086,174.393 ~ C120.03,98.23,119.357,100.115,118.5,102.097Z',
  )
  .attr(snugug_fur);
What we’ve done here is created a variable (that, by the way, is now manipulatable) called snugug_head and assigned it as a path draw inside of snugug_paper with the path coordinates that we extracted before and the attributes as defined in snugug_fur. Test your website out and you should see your drawing!

There ya go! To get the rest of your drawing into Raphael, follow the same process as we just did! Remember that more than one path can be drawn on one canvas! Have fun!